Wednesday, August 29, 2012

Fast because you HAVE to be or WANT to be.....

Today I came home from work and jumped on a dress for a young client. It went together amazingly fast and it was nice to make quick progress (pics to come soon). The whole situation prompted my recollection of an old season of Project Runway where a male contestant was being complemented for finishing a garment in record time, way ahead of the project deadline. He graciously replied " I sew for a living and my lively hood depends on. I'm fast because I have to be". For some reason the statement "I'm fast because I have to be" stuck with me. It wasn't so much his tone or expression it was just the reality of his situation that really stuck with me.

I'm not in his situation of sewing entirely for my livelihood since I have a full time job. I do however have a sewing business which requires a reasonable turnaround on alterations & custom made garments. So to a small degree I feel I have to be "fast because I have to be". And that's understandable.  Yet in sewing for myself there's a part of me that wants to be "fast for the sake of being fast". Like I literally want to get to the point where I can sew up a pair of pants and a shirt within a 24 hour period (and I'm not talking quickie pieces neither---I'm talking jeans with lots of topstitching and a chiffon blouse with lots of layers). I'm talking like Christian from Project Runway season 4. He learned to make very complex pieces in a short period of time. This is my aim and a personal goal of mine. To be able to do something well and do it in record time is quite the accomplishment. In the meantime I"ll keep working hard and continue my challenge to amass 10,000 hours of sewing. Something tells me that fast sewing will inadvertently be a byproduct of that quest.

What about you guys. Do you strive to become a fast sewer? Is it out of sheer will or obligations? Or do you prefer a slower pace?

Sunday, August 26, 2012

Part 2---10th Anniversary Weekend top McCall's 6241

This is a continuation of my last post. On Saturday we continued our anniversary celebration with a movie, lunch at P.F. Chang's, & some retail therapy at the St. John's Town Center.


 (I saw this Michael Kor's bag and fell in love. Heck, I'm not into bags but this purple, limited-edition, scratch resistant, fancy leather one caught my eye. Anyone want to gift me a $384 bag? LOL!)


 (P.F. Changs was SO good! It was our first time eating there. Everytime we've tried in the past it was packed and we couldn't get in. They have a gluten free menu which is great for me. Their lemon chicken was ridiculously good!!!)

We had a good time just getting out and exploring a bit. I wanted to wear something that was casual yet bold and fun. That's why I made McCall's 6241 and decided to wear it with some bright red capris I'd purchased the week before. I cut this out on Friday night and sewed it up on Saturday, the day we left for the trip. It's the quickest top I've ever sewn and went together in less than an hour. Here's the review.......

McCall's 6241


Time to Sew:
Less than an hour

Sewing Ease (scale 1 easy to 10 difficult):
It's a 1 for sure!

Pattern Description:
Tunic with pleated shoulder and lower side seam.

(Back View)

Pattern Sizing:
I cut the size 8.

Did it look like the photo/drawing on the pattern envelope once you were done sewing with it?
Yes!!!

Were the instructions easy to follow?
Yes!!!

What did you particularly like or dislike about the pattern?
I wanted an off the shoulder design to wear and this was perfect! I loved this pattern!

Fabric Used:
A rayon/poly/lycra knit I purchased from Fabric.com. This is a great fabric for this pattern since it's thin enough and has great drape. I love that the fabric design is white letters on a black background so it has a graffiti effect.
(Up close)

Pattern alterations or any design changes you made:
 I sewed it together using my serger and intentionally didn't add clear elastic to the shoulders as I normally do since I wanted it to really hang loose at the shoulder. I used my coverstitch to finish the neckline, sleeves and hem.

What would you do differently next time?:
Nothing.

Would you sew it again? Would you recommend it to others?
Yes! This is a cute top and I'd love to have a couple more in my wardrobe.
 Wardrobe Versatility:
-Paired with a bright pair of pants, capris or shorts
-With a black blazer & white pants/capris with wedges.
-With a vest on top & a skirt with cute sandals.


Conclusion:

Saturday, August 25, 2012

10th Anniversary Weekend Part 1- Simplicity 2580 Top

 (Colorful water fountain at Jacksonville Landing) 

We just made it back from a weekend in Jacksonville, FL celebrating our 10th Wedding Anniversary which was on Friday, August 24th. Wow, in this day and age 10 years definitely feels like a milestone. I'm very blessed to have married my best friend. We've been together for 15 years and Lord knows I wouldn't have all the fun I have without him!!!! He brings out the best in me.  Here's a little Wedding flashback photo.....

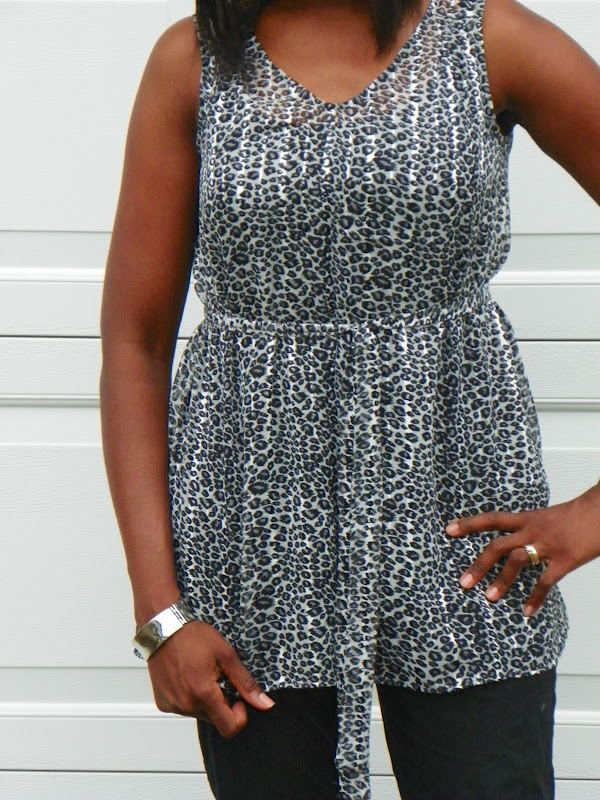
 We were planning to celebrate by jet-setting to somewhere exotic or flying out west but had to put those plans on hold. Instead at the last minute we decided to take a trip to Jacksonville. Well a week before our trip I decided to change up my sewing plans. Originally I'd planned to use this lovely floral fabric...................but after thinking long and hard about it I knew we were more than likely to go out for a night on the town then go to a fancy restaurant---not really our thing. So I thought I'd sew up something fun and sexy instead. Lord I went through all my patterns----TWICE! I was determined to find something that would embody the fun I knew we were going to have. So I ran across Simplicity 2580 and decided to convert it into a top. I knew it would fit the bill perfectly and my Hubby's positive reaction (his face lit up)  confirmed that completely!!! I finished this top in enough time and was also able to make McCall's 6241 too (I'll review it in the next post).

Simplicity 2580
(After a late night an elevator photo was as good as it was gonna get! LOL. BTW, I was wearing khaki capris and flip flops.)


Time to Sew:
This one would have been an easy 2 hours to sew up if I hadn't had to go back and take it apart for some alterations. Now you see why I usually like to make a muslin. Picking small zigzag stitches is no fun. So it took me about 3 1/2 or so.

Sewing Ease (scale 1 easy to 10 difficult):
It's about a 4

Pattern Description:
It's a knit halter dress that I converted to a top.
 (back view)


Pattern Sizing:
I cut the 10 for the bodice, increasing to size 12 at the waist and grading to a size 16 at the hem to add flair to the bottom of the top.

Did it look like the photo/drawing on the pattern envelope once you were done sewing with it?
YESSSSS!

Were the instructions easy to follow?
Yes!

What did you particularly like or dislike about the pattern?
I loved the key hole design and the fact it was a halter top.

Fabric Used:
I used a thin knit with a red, white and light blue paisley design. I've had this fabric in my stash FOREVER---back when I learned to sew in 2004. I was glad to find the right pattern for it!
(up close view)

Pattern alterations or any design changes you made:
1. I reduced the skirt length to convert the dress to a top.
2.  I reduced sides of front bodice piece by 1 1/2"
3.  Did shortwaist alteration---Took out 1" out of center back skirt and tapered to nothing at side seams to reduce length.
4. Created an elastic casing instead of pattern directions. I attached bodice back and front pieces as instructed. I then sewed through both back pieces (lining and fabric) 1" from top back edge--from side seam to side seam. A casing was created. I then too 3/4" elastic and ran it through the casing and adjusting fit. Once good fit was achieved I sewed elastic by tacking the elastic on each side seam.

What would you do differently next time?:
-If I use another thin knit I would interface all of the pattern pieces initially. I did this to the back piece, but had to add the interfacing to the front bodice after it was already sewn up and I realized the stretch was too much. The addition of a knit fusible interfacing really controlled the stretch.
-I'd also lengthen the bodice about an inch or so.

Would you sew it again? Would you recommend it to others?
I'd love to sew it as a dress. That was my original intention before I'd seen this top.

Wardrobe Versatility:
-with white slacks and a white blazer
-with white jeans
-with red or light blue capris or pants
-shorts in khaki, white & light blue.

Conclusion:
Super cute top!!!!

NEXT: 10th Wedding Anniversary Part II: Review of McCall's 6241.....


Thursday, August 23, 2012

The Crazy Denim Saga comes to a Good End....

Ok, I'm tired of talking about that strange denim I've been mentioning in the last 2 posts and I'm sure you're tired of hearing it (wink)! But there is a silver lining in it all. Susan left a comment on my last post (THANKS SUSAN!!!) on how I should just return the fabric since it was defective. I hadn't thought about that at all. I figured once I washed it I was liable for the results. But I talked to someone at Jo-Ann's (it helps that I visit the store like every other day and am on a first name basis with the managers! LOL!). I explained the situation and they told me to bring in the fabric with my receipt. So that went well!!!

As a result of the return I had a $17 credit  which I thought I'd use to get a piece of fabric I'd been STALKING for the last several weeks. This gorgeous gray knit sweater knit with gold and silver threads. It's really lightweight and would make for a cute tunic or short dress!!!

It's so PRETTY!!!!! I had a few reservations about paying the $19.99/yd price tag--and I'd need 2 so that would've been a $40 price tag (I know, I'm too frugal for my own good but I can't help it (wink)! Well it turns out I had a 50% off coupon and I combined that with the store credit and only paid $5 for the fabric. Yaaaaaaaayyyyyy!!!!

Well I think I can call this situation a "Story Book Ending"----well one for a seamstress that is! LOL!

So the moral of the story is if you suspect you may have a similar situation buy your fabric piece and an addt'l swatch. Wash the swatch as a test and If you have any problems you can return the fabric and your only loss is a swatch!!!

Oh yeah, and just so you don't think I'm INSANE here's the "disapearing design denim" as seen in-store. I snapped a pic of it today at Jo-Ann's. What a cool design, huh? Too bad washing it removes it:(

Wednesday, August 22, 2012

Disappearing Denim Design Follow-up.......

Thanks guys to all of your responses to my last post. Some of your stories were unbelievable!!!! Now it looks like I have a story to contribute also.  Well it looks like the denim fabric design was completely washed out. All that remains is a subtle imprint of it that you can only barely see by looking at the fabric sideways. Bummer. I'll save the denim for jeans I plan to make in the future.
 (this is the denim in direct sunlight. If you look closely you can see the animal print texture but the dyed design is no longer there:(

  I was planning on sewing a denim peplum top and already had NewLook #6130 all set and ready to go. I'd decided to make it last week and had been shopping for what I thought was the perfect fabric. I'd hoped to pair it with white pants or capris. I'll have to put that idea on hold until I can get some more denim that I like. Sigh.........

 But as my Mom used to say "One monkey don't stop the show"! Such a funny saying! LOL!  I've got another ace up my sleeve and I'm in the process of sewing up something else to wear later this week. I'll give details then but WOW, this was really a learning experience!!! I declare the more you sew the more you know!!!! I enjoy expanding my knowledge bank!!!! I've definitely never washed away a fabric design before. From now on I'll definitely scrutinize specialty fabrics like that denim. I may purchase a piece and then purchase a separate swatch to test in the washer. If the fabric changes then I could always take the original piece back for a refund.

Well let me get going. I have to finish up my latest piece and wrap up some client work. Here's a sneak peek of the fabric I'm currently working with.......the color is WAY more lively than my camera phone captured. I can't wait to share the finished piece:).....
Take care and happy sewing to ya!!!


Monday, August 20, 2012

Help!!! I think I may have washed out my denim design?!?!?

Today I purchased a gorgeous animal print stretch denim from Jo-Ann's today with the intention of making a cute top which I'll reveal later. In preparation to work with the fabric, since it was cotton, I naturally washed it for pre-shrinking. After washing it I pulled it from the  machine and to my surprise and dismay I didn't see the animal print design anymore. I was shocked!!!! The design was really subtle to begin with.........(see the pic---it's barely noticeable here but in good lighting you can see the animal print fairly well........
 (Animal print denim photo courtesy of Joann.com.)

 and I hadn't paid much attention to how the design was created (it appeared to be somewhat embossed).  But let me tell you that I nearly went into sheer panic when I no longer saw it. I figured I hadn't washed it correctly so I frantically checked the Joann's website to find that I'd washed it fine (I used the light cycle instead of the delicate one but that wouldn't have made a big difference). I figured all was lost and put it in the dryer for a while. By that time I was convinced I'd washed it out???? I retrieved it from the dryer a few minutes later and began to see what appears to be the design, reappearing. I've laid it on the drying rack and am hoping for the best. I won't know until the fabrics completely dry if the pattern will return in it's totality. I'm keeping my fingers crossed. Strange, huh??? Have you ever experienced anything like this with a fabric???? Have you had any pre-treatment woes???

Sunday, August 19, 2012

Simplicity 1810---The Sheer, Leopard Print Top

 Well once I finally decided how to bind the neckline/armholes on this top I was able to quickly finish it up and wear it today with a tank top underneath. I'm happy with the finished look! I've had this cute leopard print fabric in my stash for a couple of years so I was happy to put it to use. As I mentioned in my last post, I really want to add versatile pieces to my wardrobe that will go the distance. I plan to get good use out of this top!


Here's the review.....

Simplicity 1810

Time to Sew:
If I hadn't used a sheer fabric this would've been an easy sew---maybe a couple of hours. It took me twice that since I experimented with binding options.

Sewing Ease (scale 1 easy to 10 difficult):
2---it was super easy!

Pattern Description:
Pullover tunic

(up close view)

Pattern Sizing:
I cut a size small.

Did it look like the photo/drawing on the pattern envelope once you were done sewing with it?
Yes!!!!

Were the instructions easy to follow?
Very much so!

What did you particularly like or dislike about the pattern?
I loved the style! It's a cute top to wear with pants or capris.

Fabric Used:
A sheer, gray leopard print polyester with white vertical stripes.

(fabric up close)

Pattern alterations or any design changes you made:
1. I used the recommended 1/2" bias binding not only for the armholes but also for the neckline. I double folded the binding after it was sewn so it would be 1/4" wide.
2. I serged the hem edge folded it up and sewed a narrow hem edge.

What would you do differently next time?:
1. Not follow the instructions recommendation for sewing the belt and instead sew it so the raw ends aren't visible in the back especially since I didn't want to criss cross the ties in the back.
2. I noticed a slight pucker underneath the front bodice pleats. I think sewing the neck/armhole binding might have caused the extra width. To resolve it I plan to lengthen the pleats.
(back view)

Would you sew it again? Would you recommend it to others?
Probably. I think it's a great pattern for a sheer fabric!!! I definitely recommend it.

Wardrobe Versatility:
1. With black or gray capris or pants
2. Layered with a cardigan or black jacket
3. With a black vest and black leggings

Conclusion:
Super cute little top!!!

Tuesday, August 14, 2012

Tales from the Dressing Room.....the "SHORTS" Edition

I'm finding that the older I get and the more I sew, the less I like to shop for clothes. I do enjoy a good clearance sale like anyone else but to go and spend hours looking for clothes just wrecks my nerves---especially when I could possibly go home and sew it. But I have reignited my enjoyment of the instant gratification and curiosity satisfaction that comes from going into a dressing room and trying on lots of clothes to gain a sense of what does or doesn't look good on me. This ALWAYS provides me with helpful information that I can use in my own sewing plans.

Well a couple of weeks ago I attempted to sew up a pair of shorts but really didn't like the particular style on me. So I thought I'd embark on a journey to Marshall's to try on several pairs to see what looked good on my body type. Now mind you I totally forgot about last year's post. The info gained from it was helpful but I felt like I needed further investigation. So I grabbed a handful of shorts and headed to the dressing room. Here's my findings.......

Pair #1  The Cuffed Cargo shorts


(I was pleasantly surprised with this pair. These were actually cute and didn't make my legs look like twigs. I wouldn't want to wear this out to the mall so to speak (a little too short for my taste) but it would be cute on the beach over a bathing suit.)


Pair #2  The "I'm someone's-mama-and-
I-wouldn't-be-caught-dead-in-these-itsy-bitsy" shorts! LOL!
(These shorts were TOO short! I think the inseam was like 3"! Can you say Scandalous!!!)

Pair #3 The At the Knee shorts

(I liked these at first but after second thought I'm not a fan. The length is all wrong and pretty much just cuts my legs in half).


Pair # 4  The CAPRI--- in between a short and a pant


(I know alot of you gals aren't fans of capris but I love them. I realize they don't work well on all figure types but they do on mine. The key for me is the longer they are the more narrow the capri leg needs to be. I've never been a fan of the obvious culottes look.)

As a result of my sleuthing I've come to the following conclusions:

1. I can actually do "short shorts"--as in pair #1--- not the hoochie #2 version! LOL! Again, I don't really want to wear them out and about but at least I've dispelled the myth that really short shorts wouldn't work on me.
2. Knee length shorts aren't very flattering on my figure. They need to either be longer or shorter. Tapered at the knees is a weird look for me.
3. Capris, as I've always known, works wonderfully on my figure type. I especially now like the one's tapered at the hem. They make a slim girl like me look curvy!!!

Out of all 4 of the shorts I tried on  Pair #4--the capris--- ended up being a winner and for $7.50 a steal as well!!! So now I know, if I sew any shorts for the Summer then I'll opt for capris. We've got a few more months until it starts getting chilly around here so I'll see if I can squeeze a pair in.

Ok, that was fun!!! I've definitely got another trip to the department store to investigate another article of clothing planned real soon. Stay tuned..........................

Sunday, August 12, 2012

Closet Auditions beginning at 4pm today!


I have to admit that last night was the LAST straw! Frankly, I love moments like these, not so much for all of the frustration they generate, but how they force me to face my frustrations and create a plan to deal with or remedy them. Last night I just stood in my closet glaring at my clothes unable to find anything to wear for church on today. Ok, this may look like a minor problem but it was magnified considering I'd had that same problem several times this month already. At this point the picture was PRETTY CLEAR!  And it wasn't until my mind drifted back to a magazine article I read on last week did I make the connection.

The July issue of Lucky had a pretty cool article entitled "45 Days of New Outfits: How to Remix your closet". This article showed 19 pieces and how they were mixed and matched to create 45 different outfits which could take you through Summer and into Fall.
(Here are the 19 pieces.....)

(...some of the outfit ideas.....)

(.....and some more. Not all 45 are featured but you get the point!)

I personally wasn't a fan of all the pieces and outfit combos, which is understandable since it wasn't a reflection of my style. But I do LOVE the point this article demonstrated. A wardrobe filled with great interchangeable pieces will definitely yield tons of outfit options. In my post just a few months ago I excitedly discovered my style and decided to only sew/buy items I felt that embodied my simple, effortless, and feminine style. I SO want getting addressed for ANY occassion to be EFFORTLESS!!!


So I've decided to revamp my closet---beginning with a GOOD PURGE! If I have any current pieces, with the exception of a few dresses, that can't be worn at least 3 different ways then it's got to GO!!!! In addition to that everything I sew has to not only fit into the "fun, simple, effortless, and simple categories" but it also has to be versatile. If I can plan 3 different outfits with it then I'm allowed to make it (of course special occasion dresses are exceptions to this rule). So everything that makes it into my closet has to audition first!!!! Trust me this isn't the first time I've thought about creating a versatile wardrobe but I have to admit it's the only time I've gotten drastically serious about it!!!

I've already started my purging and I feel GREAT!!! As things are heading to my church's clothing store I'll also get to work on planning some versatile pieces I can sew up and /or purchase. This may be a bit much, but I hope to create a chart of all my pieces so at a glance I'll know what I can mix and match. For the record I don't want alot of pieces (my emphasis isn't on quantity) but I want pieces I can get alot of use out of!!!! Whew.....breathing a sign of relief.....I love my new strategy and I look forward to making my wardrobe woes a thing of the past!!!

BTW got a quick 2 part question for you. Is having a versatile wardrobe important to you? If so, what steps do you take to accomplish this? I'd love to hear your thoughts!!!

Thursday, August 9, 2012

I'm Going Back to School......

.........Homeschooling that is!!!!  I've been having an itching to learn draping for a few years now.  I purchased a few books on the subject over the years to aid me when I decided to embark on that journey. Well I feel like the time has come and I'm ready to get started.
 
 (my fave draping book)

I was interested in getting more formal instruction and sought out a local college where I could take a class or two. SCAD, the Savannah College of Art and Design is a prestigious art school right in town. I've visited the campus before and was able to get into the sewing/draping room a few years back (I gave a SCAD Fashion design student sewing lessons for a while). I'm quite impressed with the school and as most of you know 2 of the Project Runway contestants were SCAD alum. Well I thought I'd contact the school to find out the cost and after hearing their $3400 per class cost (with 2 prerequ's required).  I figured I'd explore some other options since I didn't want to devote $10K to my learning just yet.

So while I look into some other options (GSU, a private tutor, online class, etc) I think I'll take a stab at it on my own. I'd like to see how much ground I can cover on my own. Besides, I'm mostly self-taught with my sewing anyhow. So with that notion I'm jumping into it. Besides.......


Tonight I was watching a couple of Project Runway episodes online while reading my draping book (photo above). I was pretty happy to run across this advice.....


Such good advice! Just jump into it. You can still go back and build the fundamentals. I love this book! It's one of the best one's I own on the subject. Here's the table of contents. I'm hoping to work through each chapter and practice making each style of garment. Maybe one chapter a month? There are really clear and concise draping steps for each. Here are a couple of the pages......


I really believe understanding and studying the drape of fabric will help me tremendously with my sewing. The Fashion Insitute of Technology summarized the benefits quite well!!! As they suggest I believe draping will help me....
  1. Recognize, evaluate, and execute diverse draping styles; 
  2. Create original designs and patterns; 
  3. Improve fitting techniques; and 
  4. Interpret and execute specific silhouettes, styles and market trends.

   I love to analyze the design lines and how they translate into different fabrics. But I often don't have the sharpest eye at doing so. I'm very visual so being hands on and actually creating the designs will help me recognize the design lines of garments I see and how they're created. I would love to be able to look at most garments and figure out in my head what the pattern would look like (that's fancy dart work and all). I hope to use this info in my own design work. I've done some sketch work and look forward to one day bringing them to life:)

So I'll start with chapter 4---draping the front and back bodice and trueing the patterns. My custom dressform will be helpful with this. I'll keep you posted!!!


Tuesday, August 7, 2012

Sewing Jots & Tittles 8.7.12


Sewing jots & tittles is my weekly/bi-weekly post chronicling all of my ideas and thoughts---whether insightful or just plain zany! Here's what's been bouncing off the recesses of my mind this week.....

-I want a really quick dress for the weekend. This looks like a great option. I'm certain I'll change my mind 50 times but I will have a dress or something to wear regardless! LOL!


-A very helpful book! Trying to develop some more business ideas.....


-Got an extra scratch-off on Jo-Ann's flyer by mistake. Thought I'd be a lucky girl.  Not!


-Was serging with 4 threads. Notice only 3. One fell down behind desk. And I just kept on sewing! LOL!


-Had to choose between the teal or silver stretch tafetta. So tough! Walked around Jo-Ann's 30 min before I could even decide. The teal won out!!!


-Young client's dress muslin (Simplicity 1927) fit perfectly straight out of the envelope with NO alterations. I so wish that was always the case for me! LOL!


-I SO want this fabric for a dress for my daughter!!!


-Picked up the cutest paisley at out-of-town Hancock's fabric. It's a twill paisley print in CRAZY bright colors. Love it!!!


-Gorgeous sweater knit at Jo-Ann's. Hoping some will be left to use a 50% off coupon with!

- Racked up with Wawak.com order (formerly Atlanta Thread). They had buy 2 get 1 zipper free sale. Bought 30 invisible zippers (they're SO cheap) and got 15 free! Not bad at all!


-While I shopped for fabric my Wee-One enjoyed hiding out in the basket. Hey, whatever keeps her occupied!


Non-Sewing

-They should really think about making these gowns in smaller sizes! LOL! Not to worry visit was just a precaution.


-Didn't have to read the "ham and water product" description. The company name  "Corn King" made me nervous! LOL!


-One of the best facial scrub recipes!!!


-They are SO wrong! Option 2 shouldn't be an option! It's an OBVIOUS punishment! Geesh!!!

Sign I saw in Atlanta. Shocking!!! Not the Obama part but the small black sign underneath! I'm not one to usual point out ignorance but some people make it really easy. Broadcasting your political opinions/predjudices in such a manner is hardly appropriate! Why can't we all just get along!!!! Geesh!!!


-No local Whole Food's. Visited one while in ATL and my Hubby and I indulged. Notice Hubby's guilty look.

Loved their black cherry chicken wings! GOTTA find that recipe!


LinkWithin

Related Posts with Thumbnails